How to Install Axial Fan
Mechanical Installation
Step 1. Choosing the location for installation
Mount fans near windows, doors, or openings to promote air exchange. Ensure adequate clearance for operation and maintenance.
Step 2. Mounting the fan
Securing to a stable base with proper alignment and vibration isolation
Secure axial fans to a stable base. Use vibration-dampening mounts or rubber grommets to minimize noise and vibration transfer.
Install the fan level and ensure no strain on the housing or blades. Tighten mounting bolts evenly, avoiding over-tightening. This prevents warping and maintains proper alignment.
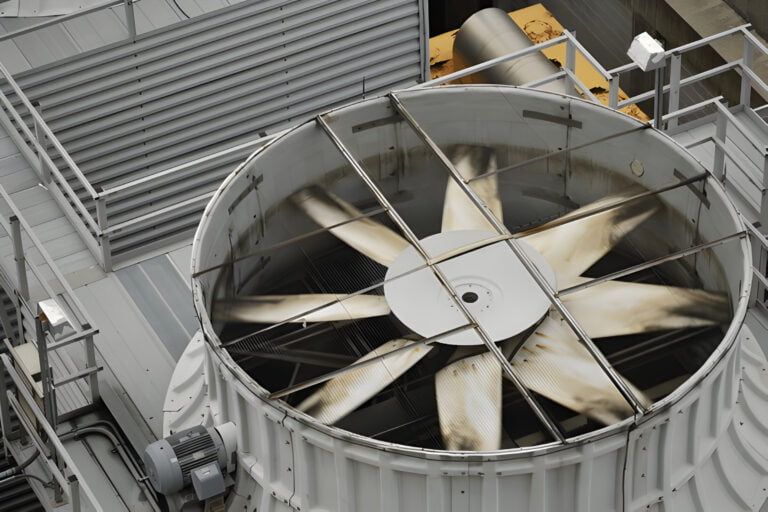
Orienting the fan for the desired airflow direction
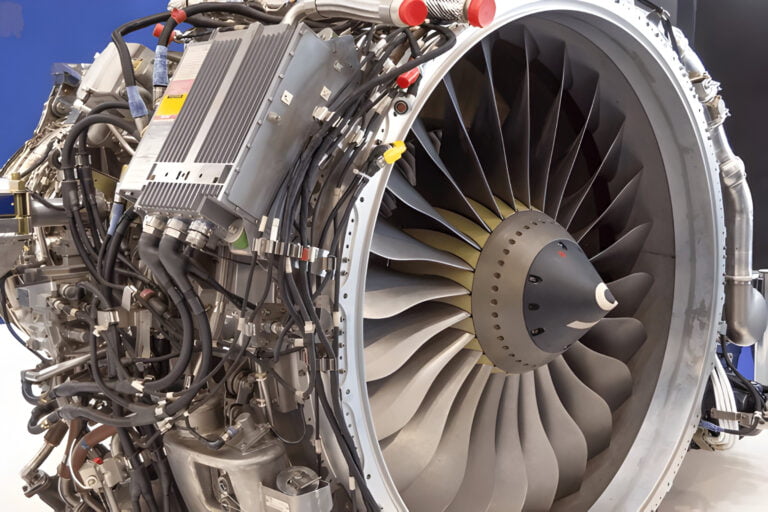
Identify the desired air movement in your space. Locate arrows on the fan housing indicating airflow direction. Align these arrows with your intended air movement when positioning the fan. If arrows are absent, the open side of fan blades typically faces the airflow direction.
Using flexible connections between fan and ductwork
Flexible connections reduce vibration transmission and compensate for misalignment between axial fans and ductwork. Install these connections on both inlet and outlet sides of the fan. Avoid overstretching or compressing the connections. Secure them with stainless steel clamps.
Step 3. Connecting ductwork
Ensuring smooth, straight duct runs to/from the fan where possible
Install ductwork using the shortest, most direct path. Minimize bends and turns to reduce air resistance and maintain efficiency. Use gradual angles instead of sharp corners when turns are necessary.
Secure and seal all connections properly. Support long duct runs to prevent sagging, which can impede airflow and strain the fan.
Sealing all joints to prevent air leaks
Apply high-quality duct sealant or metal tape to all connections between duct sections, fan housing, and transitions. Cover seams and joints completely with sealant. Seal around mounting brackets and electrical connections.
Use short, evenly spaced beads of sealant along joint edges. Spread sealant with a putty knife for uniform coverage. Allow sealant to cure fully before system operation.
For metal tape application, clean surfaces thoroughly. Cut tape to length, removing backing as you apply. Press firmly to eliminate air bubbles. Overlap tape edges by at least 1 inch for a secure seal.
Supporting ductwork independently of the fan
Ductwork support requires independent installation from the fan. Secure ducts to the ceiling or walls using sturdy hangers or brackets.
Step 4. Proper blade tip clearance and fastener tightening
Measure the gap between blade tips and fan housing with a feeler gauge. Clearance should be 0.5% to 1% of fan diameter. Tight clearance risks blade-housing contact. Loose clearance reduces efficiency. Adjust by moving motor or impeller on shaft.
Proper fastener tightening prevents vibration, noise, and damage. Use a torque wrench to tighten bolts to manufacturer specifications.
Electrical Installation
Step 5. Selecting the appropriate circuit, wiring and protection devices
Select a circuit capable of handling the fan’s power requirements without overload. Choose wire gauge based on fan amperage and distance from power source. Install a dedicated circuit breaker or fuse for electrical fault protection.
Weatherproof wiring is necessary for moisture or extreme temperature exposure. Install a disconnect switch near the fan for maintenance and emergency shutoffs. Ground the fan to prevent electrical shock hazards.
Step 6. Motor wiring
Following manufacturer’s wiring diagrams
Manufacturer’s wiring diagrams serve as critical guides for proper axial fan motor connections. Consult these diagrams before initiating any wiring processes. They detail correct wire colors, terminal placements, and voltage specifications. Adhering to these diagrams prevents motor damage and mitigates safety risks.
Proper grounding and thermal protection
Grounding protects against electrical shock and equipment damage from power surges in axial fan installations. Connect the fan’s ground wire to the building’s grounding system. Install a thermal overload device to prevent motor burnout. This device shuts off power when the motor overheats.
Step 7. Installing safety disconnect switch
Select a disconnect switch rated for your fan’s voltage and amperage. Mount it within sight of the fan and easily accessible for maintenance.
Turn off the main power supply before installation. Connect incoming power lines to the LINE side of the switch. Connect the LOAD side to the fan’s power leads. Ensure tight and secure connections.
Label the switch clearly to indicate its purpose. Test the disconnect switch to verify it cuts power to the fan when engaged.
Step 8. Connecting fan speed controls or other accessories
Install fan speed controls and accessories with the safety disconnect switch in place. Consult the fan manual for specific wiring instructions. Locate control wires from the fan motor, typically low-voltage wires separate from main power lines. Connect these to the chosen speed controller following manufacturer guidelines.
System Start-up and Testing
Step 9. Pre-start checklist
Verifying proper installation of all components
Verify proper installation of all components as part of the pre-start checklist.
- Ensure secure mounting of the fan and tight electrical connections.
- Check correct wiring and alignment of fan blades.
- Confirm absence of obstructions around the blades.
- Inspect safety guards for proper placement and secure fastening.
- Examine fan housing for loose hardware or debris.
Checking fan blade rotation direction
Verify fan blade rotation direction after component inspection. Power on the fan briefly and observe blade movement. Blades should rotate in the direction indicated by arrows on the fan housing. Incorrect rotation requires immediate power-off. Reverse motor electrical connections to correct rotation. Proper rotation ensures optimal airflow and efficiency.
Removing foreign objects from fan and ductwork
Inspect fan blades, housing, and connected ducts for debris, tools, or packaging materials before powering on the axial fan.
Step 10. Initial start-up
Monitoring for unusual noises or vibration
Monitor for unusual noises or vibrations during axial fan start-up. Listen for grinding, rattling, or excessive humming. Observe the fan unit for wobbling or shaking. Shut off the fan immediately if abnormalities occur. Investigate potential causes:
- Loose mountings
- Imbalanced blades
- Misaligned components
Measuring voltage, current and fan speed
Use a multimeter to check voltage and current draw against specified ranges. Measure fan speed with a tachometer or strobe light to confirm rated RPM. Monitor these values for fluctuations. Shut down the fan immediately if readings deviate from expected values. Troubleshoot issues before resuming operation.
For voltage measurement, connect the multimeter probes to the appropriate terminals on the fan’s power supply. Ensure the multimeter is set to the correct voltage range. Compare the reading to the fan’s specifications.
Current draw measurement involves placing the multimeter in series with the fan’s power circuit. Set the multimeter to the appropriate amperage range. Compare the measured current to the fan’s rated current draw.
To measure fan speed, use a tachometer or strobe light. For tachometers, point the device at the fan blades or attach a reflective strip to one blade. Strobe lights require adjusting the flash frequency until the fan appears stationary. Both methods provide RPM readings.
Checking operation of dampers, controls, etc
Verify damper operation during axial fan installation start-up.
Step 11. Airflow and pressure testing
Test axial fan performance after installation. Measure airflow with an anemometer at multiple ductwork points. Compare readings to manufacturer specifications. Check static pressure using a manometer at inlet and outlet to calculate pressure drop.
Adjust fan speed to achieve desired airflow and pressure. Test variable-speed models at different speeds. Listen for unusual noises or vibrations during operation. Shut down and investigate if issues arise. Monitor power consumption to verify efficient operation.
FAQs
How Long Does an Axial Fan Typically Last Before Needing Replacement?
Axial fans typically last 5-10 years with proper maintenance. Lifespan varies based on usage, environment, and quality. Regular cleaning and inspections extend longevity. Replacement is necessary when performance declines or unusual noises occur.
Can Axial Fans Be Used in Both Residential and Industrial Settings?
Axial fans are utilized in residential and industrial settings. In homes, they commonly appear in bathrooms and attics. Industrial applications include cooling large spaces and equipment. Their versatility makes them suitable for diverse environments.
What Are the Noise Levels of Different Axial Fan Models?
Axial fan noise levels range from 20-30 dB for quiet residential models to 70-80 dB for industrial fans. Manufacturer specifications provide exact ratings. Selection should consider intended use and environmental factors.
Are There Energy-Efficient Axial Fan Options Available on the Market?
Energy-efficient axial fan options are available in the market. Models featuring EC motors, variable speed controls, and high-efficiency blades offer reduced energy consumption and lower operating costs. These options provide effective solutions for energy-conscious consumers and businesses.
Can Axial Fans Be Controlled Remotely or Integrated Into Smart Home Systems?
Axial fans can be controlled remotely and integrated into smart home systems. Many models offer Wi-Fi connectivity, smartphone app control, and compatibility with voice assistants, enabling automated operation and convenient management within smart home ecosystems.